
How To
Image Unblurring: 10 Reasons Why Your Images are Blurry and How to Fix Them

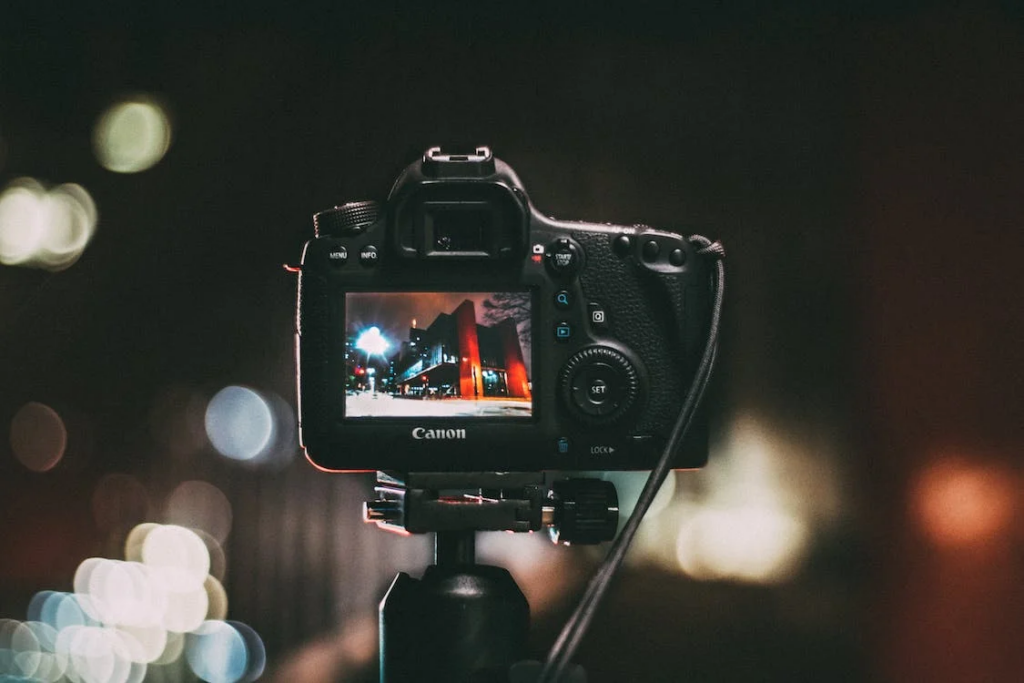
In the world of photography, capturing clear and sharp images is crucial for conveying a subject's true essence and creating a visually appealing composition. Blurry images can detract from the overall impact of a photograph, making it difficult for viewers to appreciate the finer details and emotions captured within the frame. High-quality, sharp photos are essential for professional photographers, graphic designers, and hobbyists alike, as they contribute to a polished and captivating final product.
There are several factors that can cause blurry images, ranging from camera settings and user error to environmental conditions and limitations in photo editing tools. Some common causes of blurry photos include camera shake, motion blur, incorrect focus, and insufficient lighting. In many cases, these issues can be addressed with better shooting technique, and when a photo that matters is already blurry, a real restoration artist can often help where automated tools fall short. In this blog post, we will explore 10 reasons why your images may be blurry and provide actionable solutions on how to fix them, helping you capture stunning, high-resolution images that stand out.
II. Camera Shake
A. Explanation of camera shake
Camera shake is a common cause of blurry images, resulting from the unintentional movement of the camera during exposure. This movement can be caused by unsteady hands, an unstable surface, or even pressing the shutter button too forcefully. The effects of camera shake become more pronounced when shooting with a slow shutter speed or using a telephoto lens, as even the slightest movement can significantly impact image sharpness.
B. Tips for steadying the camera
To minimize the effects of camera shake and achieve clear, high-resolution images, consider implementing the following tips:
- Use a tripod or monopod: These tools provide a stable base for your camera, reducing the likelihood of shaky camera movement.
- Improve your hand-holding technique: Hold the camera with both hands, keeping your elbows close to your body and your feet shoulder-width apart to create a stable stance.
- Utilize image stabilization: Many cameras and lenses come equipped with built-in image stabilization features, which help to counteract camera shake and produce sharper images.
- Adjust your shutter speed: A faster shutter speed can help freeze motion and reduce the effects of camera shake. As a general rule, try to use a shutter speed that is at least equal to the inverse of your focal length (e.g., 1/100s for a 100mm lens).
- Use the self-timer or a remote shutter release: By eliminating the need to press the shutter button manually, you can reduce camera shake and improve image quality.
III. Incorrect Focus
A. Causes of incorrect focus
One of the primary causes of blurry images is incorrect focus. When a camera fails to focus on the intended subject, the resulting image may appear blurry or out of focus. This can be due to several factors, such as:
- Autofocus errors: The camera's autofocus system may struggle to lock onto the desired subject, particularly in low light conditions or when photographing subjects with low contrast.
- Manual focus inaccuracies: If you are using manual focus, it's possible that the focus ring was not adjusted accurately, leading to an out-of-focus image.
- Shallow depth of field: When shooting with a wide aperture, the depth of field can be very narrow, making it challenging to keep the entire subject in focus.
B. Solutions for achieving proper focus
To ensure your images are sharp and clear, consider implementing the following solutions for achieving proper focus:
- Use autofocus points: Most cameras allow you to select specific autofocus points. Choose the point that corresponds to your subject to help the camera focus more accurately.
- Switch to manual focus: In situations where autofocus struggles, switch to manual focus and carefully adjust the focus ring until your subject appears sharp.
- Utilize focus assist features: Many cameras offer focus assist features, such as focus peaking or magnification, which can help you achieve accurate manual focus.
- Adjust your aperture: If you're experiencing issues with shallow depth of field, try using a smaller aperture (higher f-number) to increase the depth of field and keep more of your subject in focus.

IV. Slow Shutter Speed
A. Impact of shutter speed on image sharpness
Shutter speed plays a significant role in determining image sharpness. Slow shutter speeds can cause blurry images due to camera shake or motion blur, especially when capturing fast-moving subjects or shooting handheld. Conversely, fast shutter speeds help freeze motion and reduce the effects of camera shake, resulting in sharper, clearer images.
B. Choosing the right shutter speed
Selecting the appropriate shutter speed is crucial for achieving sharp, high-quality photos. Here are some tips to help you choose the right shutter speed for your photography:
- Consider the subject's movement: If you're photographing a fast-moving subject, use a faster shutter speed to freeze the motion and avoid motion blur.
- Follow the reciprocal rule: As a general guideline, use a shutter speed that is at least the inverse of your focal length (e.g., 1/100s for a 100mm lens) to minimize camera shake.
- Use a tripod or image stabilization: If you need to use a slow shutter speed, consider using a tripod or a lens with image stabilization to reduce the impact of camera shake on your photos.
- Experiment with different shutter speeds: Practice shooting at various shutter speeds to understand their effects on image sharpness and motion blur. This experience will help you make informed decisions when selecting shutter speeds in different situations.
V. Motion Blur
A. Understanding motion blur
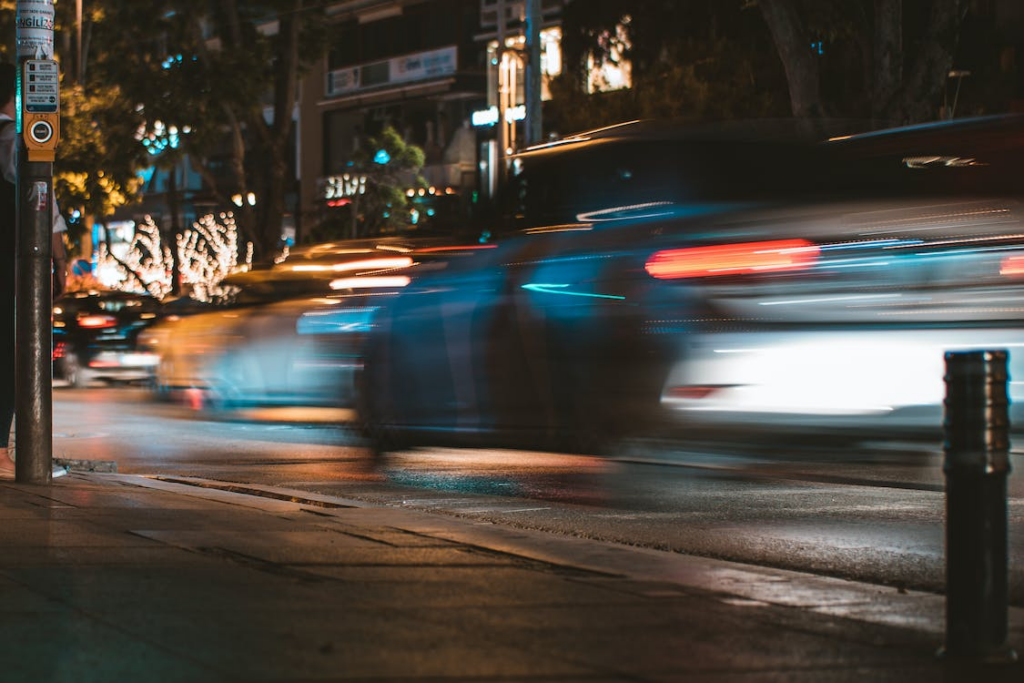
Motion blur occurs when a moving subject or camera is captured during a relatively long exposure, causing the subject or background to appear blurry in the image. This type of blur can be intentional, such as when a photographer wants to convey a sense of movement or speed, or it can be unintentional and detract from the overall photo quality. It is essential to understand the factors contributing to motion blur and learn techniques to minimize it in order to capture clear images.
B. Techniques for minimizing motion blur
Here are some effective techniques for minimizing motion blur and achieving sharper photos:
- Increase shutter speed: Using a faster shutter speed can help freeze motion and reduce motion blur. Experiment with different shutter speeds to find the optimal setting for your subject.
- Use a tripod: A stable tripod can help eliminate camera shake, which contributes to motion blur when shooting handheld.
- Utilize image stabilization: Many cameras and lenses come equipped with built-in image stabilization features, which can help counteract shaky camera movement and produce sharper images.
- Pan your camera: When photographing a moving subject, try panning your camera to follow the subject's movement. This technique can help keep the subject sharp while intentionally blurring the background.
- Adjust ISO settings: Increasing the ISO can allow you to use a faster shutter speed without underexposing the image, helping to reduce motion blur.
VI. Low Resolution
A. Effects of low resolution on image quality
Low-resolution images can significantly impact the overall quality and clarity of a photograph. Images with low resolution often appear pixelated or blurry, making it difficult to discern fine details and resulting in a less visually appealing composition. High-resolution images, on the other hand, offer greater detail and sharpness, providing a more professional and striking appearance.
B. Ensuring optimal resolution settings
To achieve the best possible image quality, it's essential to ensure that your camera settings are optimized for high-resolution photography. Consider the following tips:
- Adjust camera settings: Make sure your camera is set to capture images at the highest possible resolution and quality settings. This may involve adjusting the image size, format, and compression settings in your camera menu.
- Use a high-quality lens: A good quality lens can help capture sharper images with less distortion and better overall image quality.
- Shoot in RAW format: Shooting in RAW format can provide more detail and dynamic range, allowing for greater flexibility when editing and unblurring images in post-processing.
VII. Lens Quality and Cleanliness
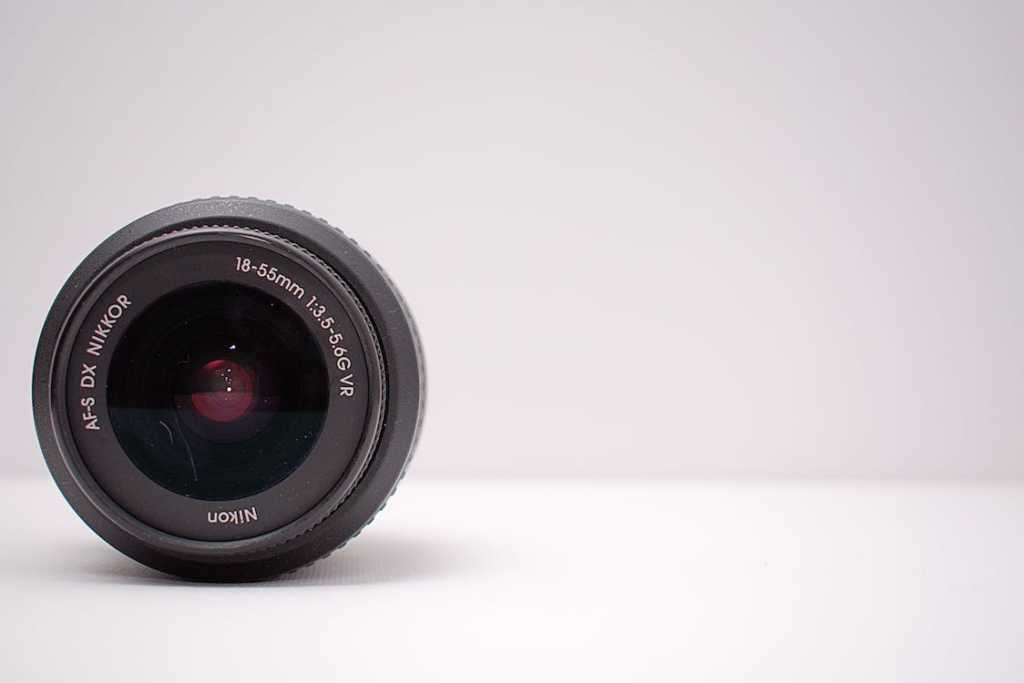
A. Role of lens quality in image sharpness
The quality of the lens plays a crucial role in producing sharp, clear images. A high-quality lens can capture more detail, reduce distortion, and minimize chromatic aberration, while a low-quality lens may result in blurry images or other unwanted effects. Investing in a good quality lens is essential for achieving the best possible photo quality.
B. Tips for maintaining lens cleanliness
Maintaining lens cleanliness is vital for ensuring optimal image sharpness and minimizing the risk of blurry images. Here are some tips to keep your lenses clean and clear:
- Use a lens cap: Always cover your lens with a lens cap when not in use to protect it from dust, dirt, and potential scratches.
- Clean your lens regularly: Use a soft, lint-free cloth or a specialized lens cleaning tissue to gently wipe away dust and smudges from the lens surface. Avoid using harsh chemicals or abrasive materials that could damage the lens coating.
- Use a blower or brush: To remove loose dust particles from the lens surface, use a blower or a soft-bristled brush designed for lens cleaning. Be gentle to avoid scratching the lens.
- Store lenses properly: Keep your lenses in a clean, dry, and temperature-controlled environment, preferably in a padded lens case or compartment within your camera bag.
- Check for issues before shooting: Before capturing an image, take a moment to inspect the lens for any smudges, dust, or debris that might impact image quality.
VIII. Insufficient Lighting
A. Influence of lighting on image clarity
Insufficient lighting can have a significant impact on image clarity, often resulting in blurry images or photos that lack detail and sharpness. Poor lighting conditions can cause the camera's autofocus system to struggle, leading to blurry photos, while subjects may appear grainy or noisy due to the need for higher ISO settings.
B. Improving lighting conditions
To capture clear images in low-light situations, consider the following tips:
- Use a tripod: A stable tripod can help reduce camera shake and motion blur, allowing you to use slower shutter speeds without compromising image quality.
- Adjust camera settings: Increase your camera's ISO setting to capture more light and maintain a faster shutter speed, reducing the risk of motion blur. Be cautious not to raise the ISO too high, as this can introduce unwanted noise into the image.
- Use a fast lens: Lenses with larger maximum apertures (lower f-numbers) can allow more light into the camera, enabling you to achieve sharper images in low-light conditions.
- Add artificial light: Introduce additional light sources, such as flash or continuous lighting, to improve the overall lighting conditions and enhance photo quality.
By implementing these strategies and using the right tools, you can effectively improve lighting conditions and capture high-resolution images free from motion blur, camera shake, or other
IX. High ISO Settings
A. Relationship between ISO and image noise
ISO settings control the sensitivity of your camera's sensor to light. Higher ISO values increase the sensor's sensitivity, allowing you to capture images in low-light conditions without using a flash. However, increasing the ISO also introduces more noise into your images, which can result in grainy or speckled appearances that detract from overall photo quality.
B. Selecting appropriate ISO settings
To achieve the best balance between image brightness and noise, consider the following tips when selecting ISO settings:
- Start with the lowest ISO: Whenever possible, use the lowest ISO setting to minimize image noise while maintaining adequate exposure.
- Increase ISO gradually: If your initial ISO setting does not provide enough light, gradually increase the ISO until you achieve the desired exposure. Be cautious not to raise the ISO too high, as this can introduce unwanted noise into the image.
- Experiment with different ISO settings: Practice shooting at various ISO levels to understand their effects on image noise and exposure. This experience will help you make informed decisions when selecting ISO settings in different situations.
- Consider your camera's capabilities: Some cameras handle high ISO settings better than others, producing less noise at higher ISO values. Familiarize yourself with your camera's performance to determine the optimal ISO range for your specific equipment.
X. Depth of Field
A. Understanding depth of field and its impact on sharpness
Depth of field refers to the range of distance within a scene that appears acceptably sharp in an image. A shallow depth of field results in only a small portion of the image being in focus, while a deep depth of field means more of the scene is sharp and clear. The depth of field can have a significant impact on the overall sharpness and clarity of your photos, as it dictates which elements of the image remain in focus.
B. Adjusting the depth of field for desired results
To achieve the desired depth of field and sharpness in your images, consider the following tips:
- Aperture settings: Adjust your camera's aperture (f-stop) to control the depth of field. A lower f-number (larger aperture) creates a shallow depth of field, while a higher f-number (smaller aperture) results in a deeper depth of field.
- Focal length: Different lenses have varying focal lengths, which can affect the depth of field. Longer focal lengths generally produce a shallower depth of field, while shorter focal lengths create a deeper depth of field.
- Distance from the subject: The closer you are to your subject, the shallower the depth of field will be. Conversely, increasing the distance between you and your subject will result in a deeper depth of field.
XI. Post-Processing Issues
A. Common post-processing mistakes that cause blurriness
- Over-sharpening: Applying too much sharpening to an image can introduce artifacts and halos, leading to a blurry or unnatural appearance.
- Excessive noise reduction: While noise reduction can improve image quality in some cases, applying too much can result in a loss of detail and a blurry image.
- Incorrect focus adjustments: Attempting to correct focus issues in post-processing can sometimes lead to additional blurriness if not done correctly.
- Insufficient resolution: When resizing images for different purposes, it's important to maintain an appropriate resolution to prevent a loss of detail and the introduction of blurriness.

B. Best practices for image editing
- Be conservative with adjustments: Apply adjustments like sharpening, noise reduction, and focus corrections sparingly to avoid introducing unwanted artifacts or blurriness in your photos.
- Preserve original images: Always work on a copy of your original image to ensure you can revert to the original if any editing mistakes are made.
- Focus on the details: Pay close attention to image edges, fine details, and textures while editing to maintain overall image quality and prevent introducing unintended blur.
- Consider data security: When using online tools for image editing, ensure the platform provides adequate data protection measures to keep your images safe.
XII. Conclusion
A. Recap of reasons for blurry images and their solutions
Blurry images can be a result of various factors, such as motion blur, camera shake, and low photo quality. For everyday snapshots, careful technique prevents most of these issues. For an irreplaceable photo that is already blurry, be careful with automated AI tools, they invent detail rather than recover it, and consider a real restoration artist instead.
B. Apply these techniques for improved image quality
By applying the techniques discussed in this article, you can significantly improve your image quality and transform your blurry photos into clear, high-resolution images. And when the blurry photo is one you can’t replace, the only picture of someone you love, let a real artist restore it by hand. We recover what’s there; we never invent a face. With the right approach and tools, you'll be able to bring your blurry pictures back to life and enjoy clear, stunning images.
FAQ:
1. How do you unblur a picture for free?
You can try a free online unblur tool, many people do. Just know how they work: AI apps don’t recover your photo’s real detail, they borrow it from other images, which is why faces often come back looking not quite right. For a photo that matters, a real restoration artist working by hand is the safer choice.
2. Is there an unblurring app?
Yes, there are various apps that promise to unblur images. They’re fine for casual snapshots, but they work by guessing at detail, so on faces the result may not quite look like the person you remember. For an irreplaceable photo, have a real artist restore it by hand.
3. How do you unblur photos on iPhone?
Phone apps can sharpen a slightly soft snapshot, but they lean on AI, and AI doesn’t recover real detail, it invents it. For a photo of someone you love, that’s the one thing that can’t happen. A real artist can restore it by hand instead.
Ready to restore your own photos?
Our artists bring your damaged photos back by hand, most within a few days.
Rated 4.96 out of 5 stars.4.96/5 · Loved by 400,000+ families